Deno 2.9 リリース記事が6/25に公開された。
今回はこれを試す。
参考 実行環境 試す Deno Desktop は、Deno 2.9 から使用可能になった実験的機能。
最小構成 ブログ記事曰く最小構成は以下のようになる。
main.ts 1 2 3 4 5 6 Deno .serve (() => new Response ( "<!DOCTYPE html><h1>Hello from Deno desktop 👋</h1>" , { headers : { "content-type" : "text/html" } }, ) );
これを以下のように実行する。
カレントディレクトリ以下にファイルが作られる。
1 2 3 4 5 6 7 8 │ deno.json │ main.ts │ └─test512-deno-desktop .downloaded laufey_webview.exe test512-deno-desktop.bat test512-deno-desktop.dll
test512-deno-desktop.batの中を見ると、以下のようになっており、laufey_webview.exeに対してdllを渡して実行するという様子になっている。
1 2 3 @echo off set DIR =%~dp0 "% DIR %laufey_webview.exe" --runtime "test512-deno-desktop.dll" %*
これを起動してみるのだが、起動したものは応答無くなってしまい、動作しなかった(実験的機能であるためこれ自体は仕方がない。)。
しかし、Deno Desktop は、WebView以外にChromium Embedded Framework(cef)を使うことができる。
1 $ deno desktop --backend cef ./main.ts
実行し、作成されたものを確認するとWebView退避で作成されたファイルが非常に多くなる。
1 2 3 4 5 6 7 8 9 10 11 12 13 14 15 16 17 18 19 20 21 22 23 24 25 26 27 28 29 30 31 32 33 34 35 36 37 │ deno.json │ main.ts │ └─test512-deno-desktop │ .downloaded │ bootstrap.exe │ bootstrapc.exe │ chrome_100_percent.pak │ chrome_200_percent.pak │ chrome_elf.dll │ d3dcompiler_47.dll │ dxcompiler.dll │ dxil.dll │ icudtl.dat │ laufey.exe │ libcef.dll │ libcef.lib │ libEGL.dll │ libGLESv2.dll │ resources.pak │ test512-deno-desktop.bat │ test512-deno-desktop.dll │ v8_context_snapshot.bin │ vk_swiftshader.dll │ vk_swiftshader_icd.json │ vulkan-1.dll │ └─locales af.pak af_FEMININE.pak af_MASCULINE.pak af_NEUTER.pak am.pak am_FEMININE.pak am_MASCULINE.pak am_NEUTER.pak 以下言語パック?が並ぶ
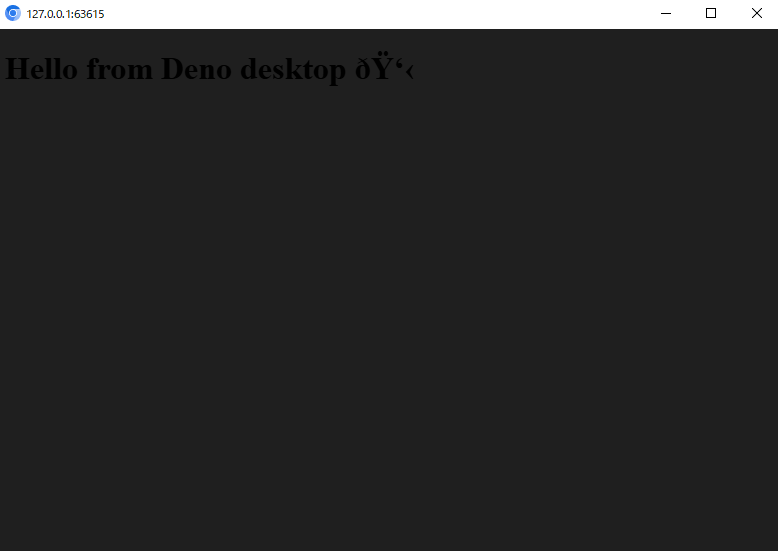
test512-deno-desktop.bat を実行すると、以下のように起動する。
暗い。そして絵文字はうまく解釈されなかったようである。
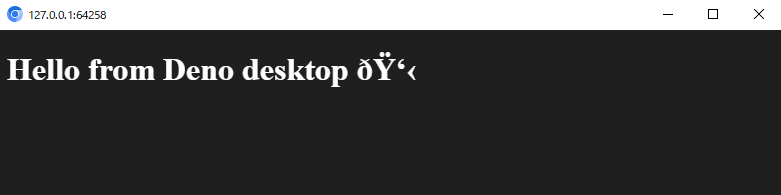
試しに、スタイルをベタ書きしてみる。
1 2 3 4 5 6 Deno .serve (() => new Response ( "<!DOCTYPE html><h1 style=\"color: white\">Hello from Deno desktop 👋</h1>" , { headers : { "content-type" : "text/html" } }, ) );
再度起動して文字色の修正できたことを確認できる。
ビルドと配布 deno desktop は、同一マシンでWindows向け、Mac向け、Linux向けのバイナリを作ることができる。
対応のアーキテクチャーは以下のように記載がある。
Triple
OS
Arch
aarch64-apple-darwin
macOS
arm64
x86_64-apple-darwin
macOS
Intel
x86_64-pc-windows-msvc
Windows
x86_64
aarch64-unknown-linux-gnu
Linux
arm64
x86_64-unknown-linux-gnu
Linux
x86_64
引用: Supported triples
また、出力形式についても拡張子の記載に依存してそれ用ものとなるとのこと。
windows であればディレクトリ名とmsiに対応しており、ディレクトリの場合には先に紹介したようにファイル群が並ぶ。
msiの場合には、msiファイルが作成される。
1 2 3 4 5 $ deno desktop --backend cef --output app.msi ./main.ts $ ls app.msi Mode LastWriteTime Length Name ---- ------------- ------ ---- -a---- 2026/06/28 17:18 195031040 app.msi
起動すると、インストラーが起動する。
クロスビルドもできるということで、Mac向けのバイナリを作ってみる。
1 2 3 4 5 6 7 8 9 10 11 12 13 14 15 16 $ deno desktop --backend cef --target aarch64-apple-darwin --output app.app .\main.ts ⚠ deno desktop is experimental and subject to change Compile main.ts to app.dylib Embedded Files app.dylib └── main.ts (475B) Files: 2.1KB Metadata: 1.53KB Remote modules: 12B Downloading laufey cef backend for aarch64-apple-darwin (v0.4.0) Download laufey-cef-aarch64-apple-darwin.tar.gz 6.31MiB/121.29MiB [00:06] [
実行結果はディレクトリに展開される。
1 2 3 $ deno desktop --backend cef --target aarch64-apple-darwin --output app.dmg .\main.ts ⚠ deno desktop is experimental and subject to change error: Building a .dmg requires a macOS build host (uses hdiutil). Requested output: app.dmg. Build on macOS, or choose a different output format.
このことは、クロスコンパイルについての記載がある。
To produce a .dmg from another platform, build it on a macOS CI machine.
参考: docs.deno.com - desktop Apps
Fresh をデスクトップアプリにする Deno Desktop は、フレームワークの検出機能を持つ。と記載がある。
Next.js
Astro
Fresh
Remix
Nuxt
SvelteKit
SolidStart
TanStack Start
Vite SSR
Freshの対応があることに喜び、これをしてみたい。
1 2 3 4 5 6 7 8 9 10 11 12 13 14 15 16 17 18 19 20 21 $ deno run -Ar jsr:@fresh/init deno run -Ar jsr:@fresh/init 🍋 Fresh: The next-gen web framework. version 2.3.3 Project Name: fresh-desktop Set up Tailwind CSS for styling? [y/N] y Do you use VS Code? [y/N] y Project initialized! Enter your project directory using cd fresh-desktop. Run deno task dev to start the project. CTRL-C to stop. Stuck? Join our Discord https://discord.gg/deno Happy hacking! 🦕 cd fresh-desktopdeno task build deno desktop --backend cef .
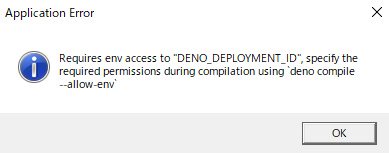
これでここまでの確認のように起動ができる。しかし、素直には起動しない。
ここでエラー内容からもわかるのは、Deno Desktop はデスクトップ向けのDeno compileだということ。
Because deno desktop is built on the same machinery as deno compile
参考: deno.com - blog - Deno 2.9
ためしにヘルプを出すとちゃんとパーミッション機能についてフォローされている。
1 2 3 4 5 6 7 8 9 10 11 12 13 14 15 16 17 18 19 20 21 22 $ deno desktop -h Build and run desktop applications. deno desktop main.tsx deno desktop --hmr main.tsx deno desktop --output MyApp.app main.tsx deno desktop Compiles the given script into a desktop application using a backend for the UI layer. The entrypoint can be a file, or omitted (or .) to auto-detect a supported framework (Next.js, Astro, etc.) in the current directory. Read more: https://docs.deno.com/go/desktop Usage: deno desktop [OPTIONS] [SCRIPT_ARG]... Arguments: [SCRIPT_ARG]... Script arg Options:(省略) -E, --allow-env[=<VARIABLE_NAME>...] Allow access to environment variables. Optionally specify accessible environment variables.
改めてビルドする。
1 $ deno desktop -E --backend cef .
結果を実行すると、エラーにはならないが、次はただ画面が白->黒くなった。
経験的にこういうものはMacだと問題ないということがあるので、そちらで試してみるがうまくはいかなかった。
1 2 3 4 $ deno task build $ deno desktop --backend cef --output app.dmg .
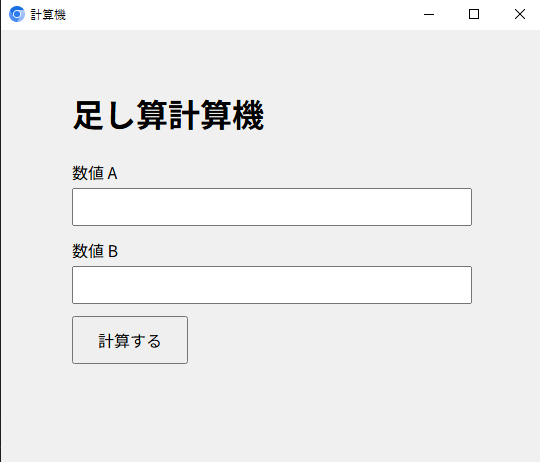
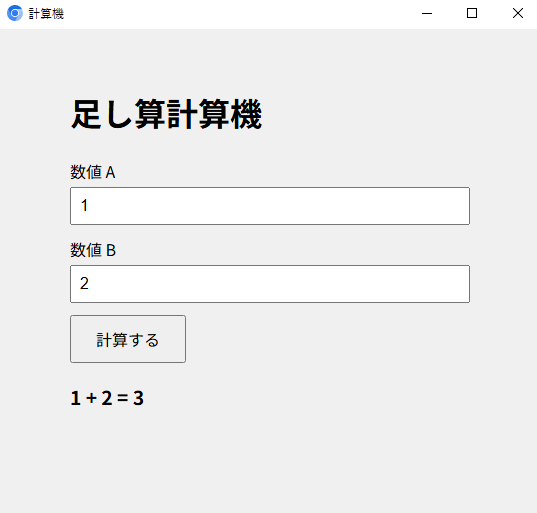
自作アプリ ここまで振り返り、シンプルに足し算するだけのアプリを書いてみる。
1 2 3 4 5 6 7 8 9 10 11 12 13 14 15 16 17 18 19 20 21 22 23 24 25 26 27 28 29 30 31 32 33 34 35 36 37 38 39 40 41 42 43 44 45 46 47 48 49 50 51 52 53 54 55 56 57 58 59 60 61 62 63 64 65 66 67 68 69 const html = `<!DOCTYPE html> <html lang="ja"> <head> <meta charset="UTF-8"> <meta name="viewport" content="width=device-width, initial-scale=1.0"> <title>計算機</title> <style> body { font-family: sans-serif; max-width: 400px; margin: 60px auto; padding: 0 16px; background-color: #f0f0f0; } h1 { margin-bottom: 24px; } label { display: block; margin-bottom: 4px; } input { width: 100%; box-sizing: border-box; padding: 8px; font-size: 1rem; margin-bottom: 12px; } button { padding: 10px 24px; font-size: 1rem; cursor: pointer; } #result { margin-top: 20px; font-size: 1.2rem; font-weight: bold; } #error { margin-top: 20px; color: red; } </style> </head> <body> <h1>足し算計算機</h1> <form id="calcForm"> <label for="a">数値 A</label> <input type="number" id="a" name="a" required> <label for="b">数値 B</label> <input type="number" id="b" name="b" required> <button type="submit">計算する</button> </form> <div id="result"></div> <div id="error"></div> <script> document.getElementById('calcForm').addEventListener('submit', async (e) => { e.preventDefault(); const a = document.getElementById('a').value; const b = document.getElementById('b').value; document.getElementById('result').textContent = ''; document.getElementById('error').textContent = ''; try { const res = await fetch('/api/calc?a=' + encodeURIComponent(a) + '&b=' + encodeURIComponent(b)); const data = await res.json(); if (!res.ok) { document.getElementById('error').textContent = data.error ?? '計算に失敗しました'; } else { document.getElementById('result').textContent = a + ' + ' + b + ' = ' + data.result; } } catch { document.getElementById('error').textContent = '通信エラーが発生しました'; } }); </script> </body> </html>`; Deno.serve((req) => { const url = new URL(req.url); if (url.pathname === "/api/calc") { const a = Number(url.searchParams.get("a")); const b = Number(url.searchParams.get("b")); if (isNaN(a) || isNaN(b)) { return new Response(JSON.stringify({ error: "a と b に有効な数値を指定してください" }), { status: 400, headers: { "content-type": "application/json" }, }); } return new Response(JSON.stringify({ result: a + b }), { headers: { "content-type": "application/json" }, }); } return new Response(html, { headers: { "content-type": "text/html; charset=utf-8" } }); });
これをDeno desktopでビルド。
1 $ deno desktop --backend cef ./main.ts
起動すると動作を確認できる。
このくらいサクッとデスクトップアプリを見知ったCSSとTSで作れるのは体験がいい。
これまでも、Desktopアプリを作ることを目的としたフレームワークはあったが、準備や場合によっては他言語の知識も必要なものだった。
Deno Desktop は、Deno 登場時のように「Deno だけあれば面倒な TypeScript のセットアップをスキップできるよ」をデスクトップアプリで実現したものと感じられる。
現在は実験的機能であるし、これからにも期待したい。
では。