Babylon.js x havok で関節(拘束)を構成する

先日 babylon.js x havok で記事を書いたものの、もう少しやってみたいので関節を組み込んでみる。

参考

調べてみると

調べてみると、Joints という関節めいた項目ではあるものの、実際には、「拘束」という表現が正しい様子。
使用するクラスの名称も ~~Constraint という名前になっていた。

あくまで、一定の自由度を許す(許さないこともある)拘束の機能として機能している様子。
資料の記載の限りであれば、以下の拘束の種類がある。

  • Hinge
  • Ball and Socket
  • Cone Twist
  • Wheel
  • Slider
  • Prismatic
  • Distance
  • Locked

今回はこれらの中から Locked、Hinge、Sliderを使ってみる。

実装

Locked - 固定

main.ts
1
2
3
4
5
6
7
8
9
10
11
12
13
14
15
16
17
18
19
20
21
22
23
24
25
26
27
28
29
30
31
32
33
34
35
36
37
38
39
40
41
42
43
44
45
46
47
48
49
50
51
52
53
54
55
56
57
58
59
60
61
62
63
64
65
66
67
68
69
70
71
72
73
74
75
76
77
78
79
80
81
82
83
84
85
86
87
88
89
90
91
92
93
94
95
96
97
98
99
100
101
102
103
104
105
106
107
108
109
110
111
112
113
114
115
116
117
118
119
120
121
122
123
124
125
126
127
128
129
import * as BABYLON from "babylonjs";
import HavokPhysics from "@babylonjs/havok";
import havokWasmUrl from "../assets/HavokPhysics.wasm?url";

const canvas = document.getElementById("renderCanvas");

const havok = await HavokPhysics({
locateFile: () => havokWasmUrl,
});

const engine = new BABYLON.Engine(canvas, true, {
preserveDrawingBuffer: true,
stencil: true,
});

// シーンの作成
const scene = new BABYLON.Scene(engine);

// 物理エンジンの有効化
scene.enablePhysics(
new BABYLON.Vector3(0, -9.8, 0),
new BABYLON.HavokPlugin(true, havok)
);

const camera = new BABYLON.ArcRotateCamera(
"Camera",
(Math.PI * 60) / 180,
(Math.PI * 120) / 180,
-40,
BABYLON.Vector3.Zero(),
scene
);

camera.setTarget(BABYLON.Vector3.Zero());
camera.attachControl(canvas, true);

// 地面の作成
const ground = BABYLON.MeshBuilder.CreateGround(
"Ground",
{ width: 30, height: 30 },
scene
);

const groundAggregate = new BABYLON.PhysicsAggregate(
ground,
BABYLON.PhysicsShapeType.BOX,
{ mass: 0, friction: 10 },
scene
);

// 照明の作成
const light = new BABYLON.HemisphericLight(
"light",
new BABYLON.Vector3(-300, 300, 0),
scene
);

// ボールの作成
const ballMaterial = new BABYLON.StandardMaterial("ballMaterial");
ballMaterial.diffuseColor = new BABYLON.Color3(0.8, 0.8, 0.8);
const ballMesh = BABYLON.MeshBuilder.CreateSphere(
"ball",
{ diameter: 1.0 },
scene
);
ballMesh.position = new BABYLON.Vector3(0, 1, -5);
ballMesh.material = ballMaterial;
const ballPhysics = new BABYLON.PhysicsAggregate(
ballMesh,
BABYLON.PhysicsShapeType.SPHERE,
{ mass: 10, friction: 1 },
scene
);

const baseMaterial = new BABYLON.StandardMaterial("baseMaterial");
baseMaterial.diffuseColor = new BABYLON.Color3(0.6, 0.6, 0.6);

const boxMesh1 = BABYLON.MeshBuilder.CreateBox(
`box1`,
{ height: 1, width: 10, depth: 1 },
scene
);
boxMesh1.position = new BABYLON.Vector3(0, 0.5, 5.5);
boxMesh1.material = baseMaterial;

const boxMesh2 = BABYLON.MeshBuilder.CreateBox(
`box2`,
{ height: 1, width: 1, depth: 10 },
scene
);
boxMesh2.position = new BABYLON.Vector3(5.5, 0.5, 0);
boxMesh2.material = baseMaterial;


const a = new BABYLON.PhysicsAggregate(
boxMesh1,
BABYLON.PhysicsShapeType.BOX,
{ mass: 2, friction: 1 },
scene
);

const b = new BABYLON.PhysicsAggregate(
boxMesh2,
BABYLON.PhysicsShapeType.BOX,
{ mass: 2, friction: 1 },
scene
);

// 固定の接続の定義
const joint = new BABYLON.LockConstraint(
new BABYLON.Vector3(0, 0, -5.5), // 物体1のどの位置に接続するか
new BABYLON.Vector3(-4.5, 0, 0), // 物体2のどこに接続するのか
undefined,
undefined,
scene
);

a.body.addConstraint(b.body, joint);

engine.runRenderLoop(function () {
scene.render();
});

setTimeout(() => {
ballPhysics.body.applyImpulse(
new BABYLON.Vector3(200, 0, 0),
ballMesh.position
);
}, 3000);

動かしてみると次のようになる。

物体の拘束位置を決めている処理があるが、これは事前に並べておいた物体の位置と一致させてある。

1
2
3
4
5
6
7
const joint = new BABYLON.LockConstraint(
new BABYLON.Vector3(0, 0, -5.5), // 物体1のどの位置に接続するか
new BABYLON.Vector3(-4.5, 0, 0), // 物体2のどこに接続するのか
undefined,
undefined,
scene
);

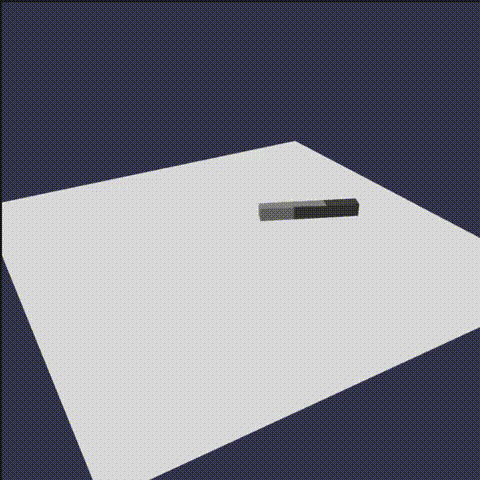
適当に原典に2つの箱を置いた状態で動かすと次のようになってしまう。

1
2
3
4
5
6
7
8
9
10
11
12
13
14
15
const boxMesh1 = BABYLON.MeshBuilder.CreateBox(
`box1`,
{ height: 1, width: 10, depth: 1 },
scene
);
boxMesh1.position = new BABYLON.Vector3(0, 0.5, 0);
boxMesh1.material = baseMaterial;

const boxMesh2 = BABYLON.MeshBuilder.CreateBox(
`box2`,
{ height: 1, width: 1, depth: 10 },
scene
);
boxMesh2.position = new BABYLON.Vector3(0, 0.5, 0);
boxMesh2.material = baseMaterial;

吹き飛ぶ というわけで初期配置には注意が必要であるらしい。

Hinge - ヒンジ

実装は次の通り。

  • 先の固定のソースコードを削除
  • 円柱を箱の先端に設置
  • 円柱と箱をそれぞれヒンジ関節で接続
1
2
3
4
5
6
7
8
9
10
11
12
13
14
15
16
17
18
19
20
21
22
23
24
25
26
27
28
29
30
31
32
33
34

// 円柱を作成
const cylinderMesh = BABYLON.MeshBuilder.CreateCylinder("cylinder", { height: 1, diameter: 1}, scene);
cylinderMesh.position = new BABYLON.Vector3(5.5, 0.5, 5.5);
cylinderMesh.material = baseMaterial;

const c = new BABYLON.PhysicsAggregate(
cylinderMesh,
BABYLON.PhysicsShapeType.BOX,
{ mass: 2, friction: 1 },
scene
);

// 円柱と箱1を拘束
const joint1 = new BABYLON.HingeConstraint
(
new BABYLON.Vector3(0, 0, 0),
new BABYLON.Vector3(5.5, 0, 0),
new BABYLON.Vector3(0, 1, 0),
scene
);
c.body.addConstraint(a.body, joint1);

// 円柱と箱2を拘束
const joint2 = new BABYLON.HingeConstraint
(
new BABYLON.Vector3(0, 0, 0),
new BABYLON.Vector3(0, 0, 5.5),
new BABYLON.Vector3(0, 1, 0),
scene
);
c.body.addConstraint(b.body, joint2);

動かすと次の通り。

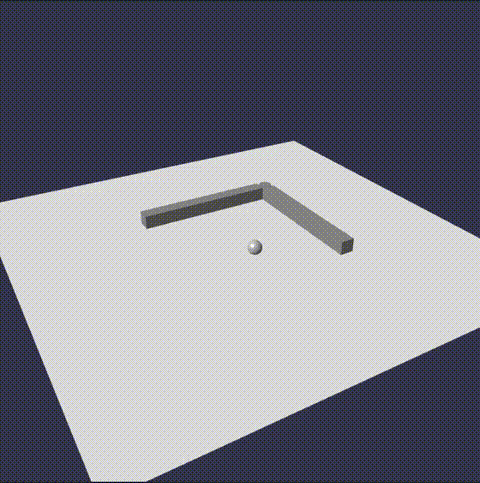
折れ曲がって落ちていく様子を確認できる。
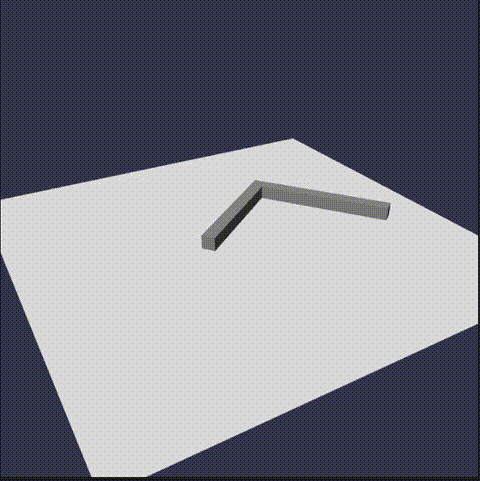
今回は箱2つの間に、円柱を置いている。
円柱は無くてもヒンジは構成できる。
しかし回転軸が箱の間の何もない空間になってしまうこともあり、置いた。
箱-固定->円柱-ヒンジ->箱でも解決するし、この方がシンプルである。
スムーズに曲がるのは面白いが、軸の回転の渋さみたいなものも調整してみたかった。
(今回は見つけられなかった。)

Slider - スライダー

スライダーをうめこんでみる
スライダーと聞くと、1軸上の前後運動になりそうに思えるが実はその軸での回転のできる。
回転なしの前後運動だけできる拘束は、Prismatic だそうだ。

実装は次の通り。

1
2
3
4
5
6
7
8
9
10
const joint1 = new BABYLON.SliderConstraint
(
new BABYLON.Vector3(0, 0, 0),
new BABYLON.Vector3(5, 0, 0),
new BABYLON.Vector3(1, 0, 0),
scene
);

b.body.addConstraint(a.body, joint1);

動かすと次の通り。

斜めに球をぶつけて縮む様子がわかる。
横方向にはスライダーとして拘束されているので2つの箱の両方とも向きが変わっている。


今回は、babylon.js の関節の機能を3つ試した。
ゲーム的には、ある一定方向に押し込む岩、開く扉などが作れそうなものを感じる
(物理エンジンでやることなのかという問題は置いておき。)

ドキュメントを見ると、Joint の項目には Motor の記述もあるものの、~~Constraint にそれらの記述がない。
joint.setMotor(speed); のようなメソッドがあるように見えるが、無いのでドキュメントの更新を待ちたい。
これができると車なども、もっとうまく作れそう。
回転は難しかったがスライダのような直動機構であれば、applyImpulse で動かすことはできた。

では。