Deno Deploy に、Prisma Postgres をリソース提供する機能が増えていたのでこちらを試します。
参考
資料曰く
Prisma Postgres instances and claiming Jump to headingには、以下のように記述があります。
When you provision a managed Prisma Postgres database instance through Deno Deploy, the instance is initially “unclaimed”. This means that the instance is managed by Deno Deploy on your behalf, but you do not have direct access to the Prisma account that owns the instance. Unclaimed instances have default limits on the number of databases and size based on Deno Deploy’s plans.
If you want to have full control over the Prisma Postgres instance, including to upgrade to a higher Prisma plan, you can “claim” the instance into your own Prisma account. To do this, go to the database instance detail page in the Deno Deploy dashboard, and click the “Claim Instance” button. You will be guided through the process of linking the instance to your Prisma account.
「unclaimed」という状態がわかりにくいが、Deno Deploy 側のプラン状態に基づいて容量と数の制限がある様子。
後続で試した際に2つ作ることはできた。
作成された結果を見ると以下のように表示されている。
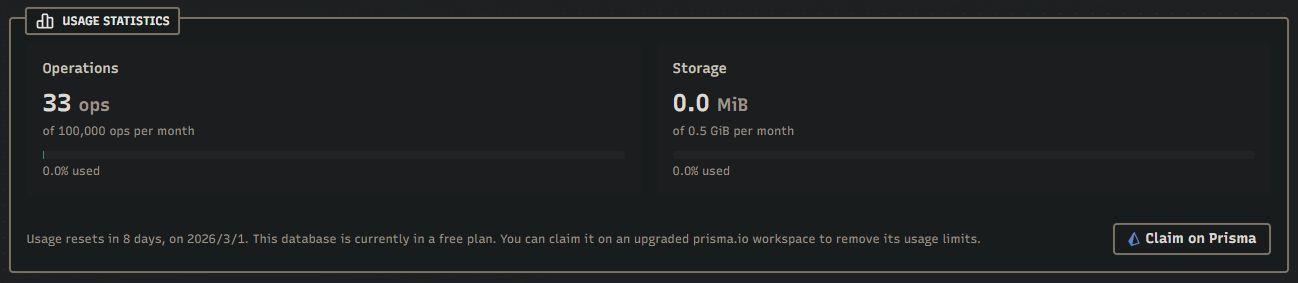
- 月10万リクエスト
- 0.5GBのストレージ
という記載だった。
deployの価格には、databaseの項目は現在の所無い。
これらの制限は、Prismaアカウントに請求/申請をすることで、制限解除ができる様子。
これは金がかかるようなので、チャレンジは見送る。
動作確認
データベース作成
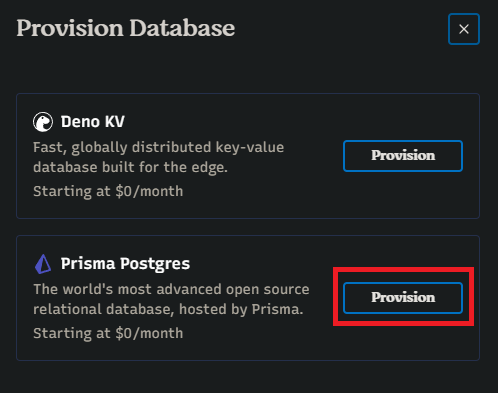
コンソールから、データベース画面に移動し、「Provision database」を押す。

「Prisma Postgres」を選択。
Slug、Regionを選択して、「Provision database」を押す。
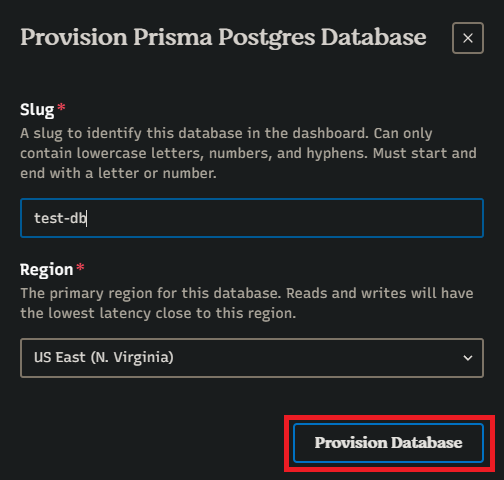
データベースの作成が完了する。

データベース接続
先に作ってあるDeno Deployのプロジェクトにデータべ―スを接続する。
「Assign」を押す。

プロジェクトを選択して、「Assign database」を押す。

データベース利用
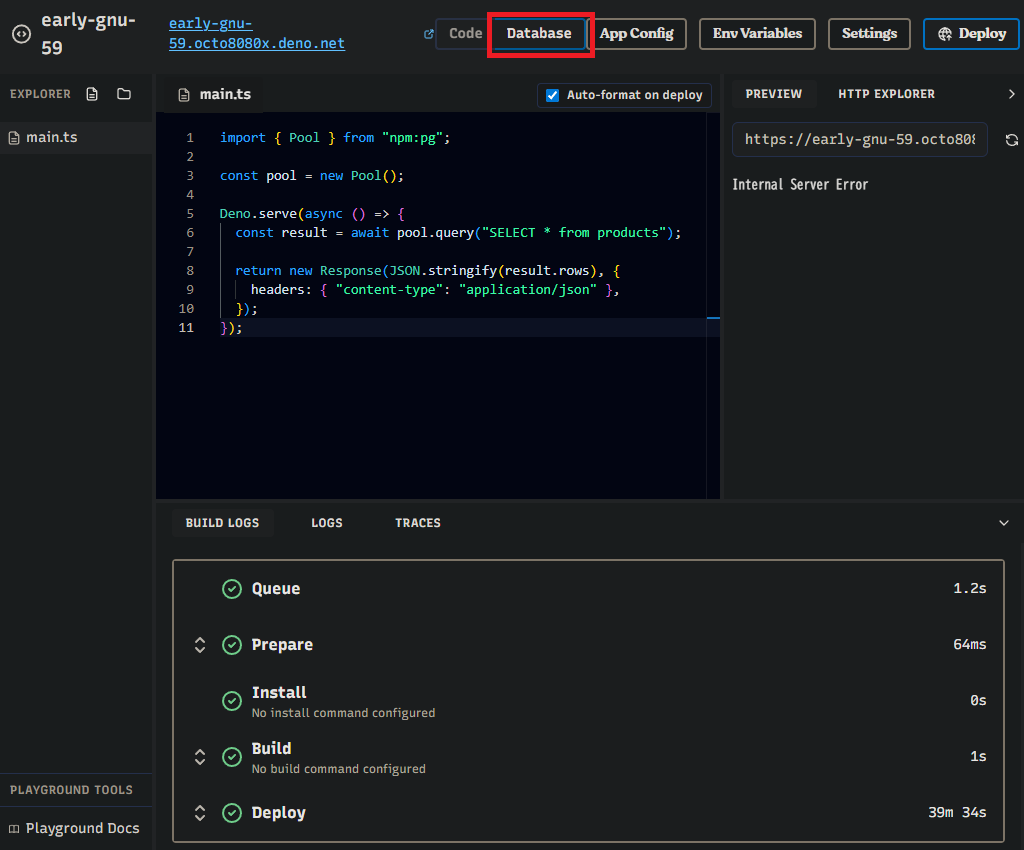
先に使用していたプロジェクトは、Playground にしておいたので、以下のコードを貼り付ける。
そしてDeployする。
1 | import { Pool } from "npm:pg"; |
productsテーブルは作っていなかったので、それを作成する。
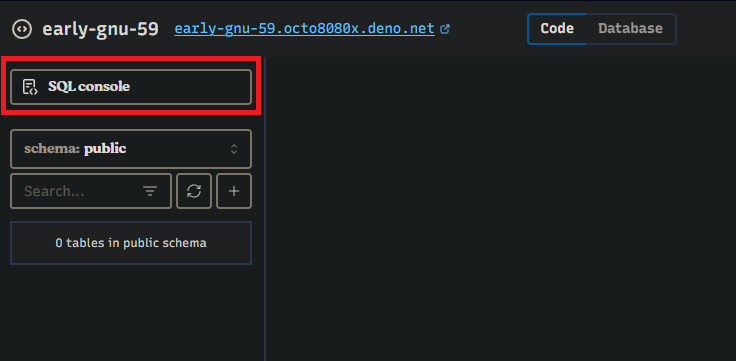
「database」を押して、「SQL console」を押す。
テーブル作成と、データの投入する。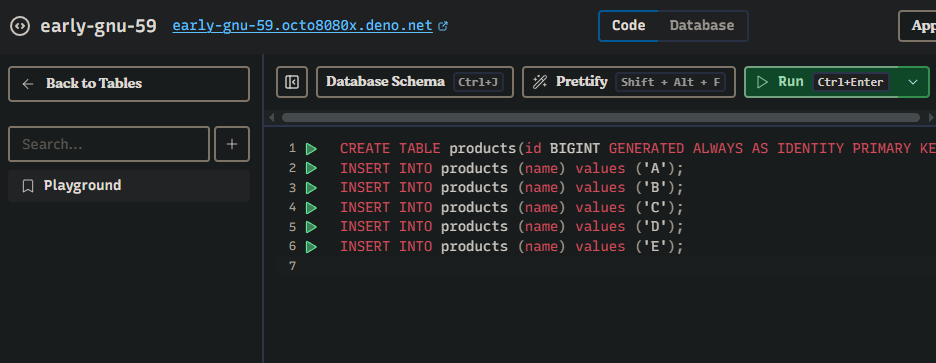
1 | CREATE TABLE products(id BIGINT GENERATED ALWAYS AS IDENTITY PRIMARY KEY, name VARCHAR(100) NOT NULL); |
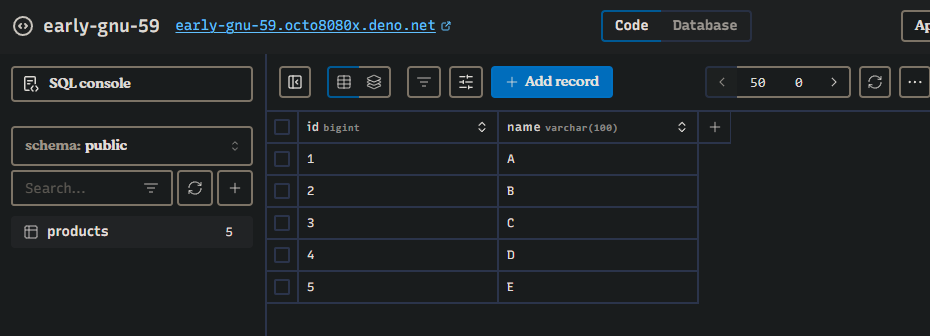
登録できれば、以下のようにデータが見える。
実行
右側パネルで、リロードのボタンを押すレスポンスが見える。
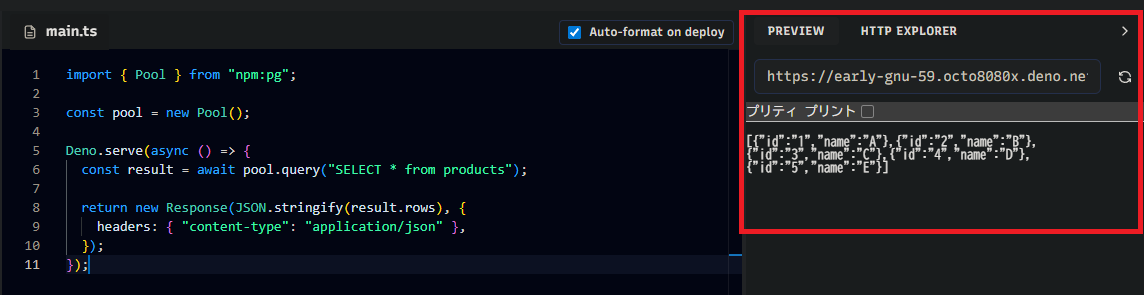
これでアプリケーションからDBまでの接続ができていることがわかる。
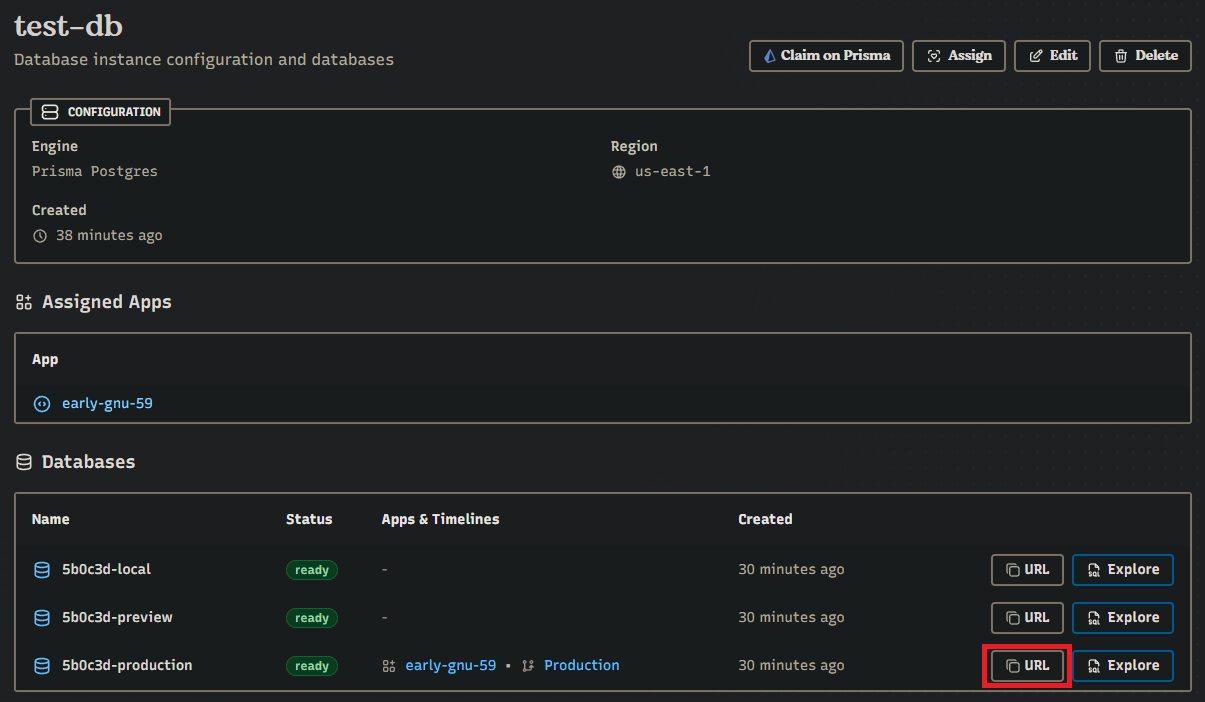
データベース
Deno Deployのアプリケーションでは、内部的に環境変数が提供されており、データべ――スの接続情報がやや隠蔽されている。
データベースの詳細を見るとURLの掲載があるのでここからコピーする。
ここで提供される以下のようになっている。
1 | postgresql://hogehogehogehogehogehoge:hogehogehogehoge@db.prisma.io:5432?sslmode=verify-full |
URLから見て、データベース提供元が、prisma.io であることがよくわかる。
逆にここまでの画面ではロゴは出ていてもprismaを意識することはほぼない。
アプリケーションのデプロイ前にこれを使ってマイグレーションも行える。
それこそPrisma migrateもつかえるでしょう。
以下のようにローカルで動かして接続を確認できる。
1 | CONNECTION_STRING=postgresql://hogehogehogehogehogehoge:hogehogehogehoge@db.prisma.io:5432?sslmode=verify-full |
1 | import { Pool } from "npm:pg"; |
1 | $ deno run -NE --env ./main.ts |
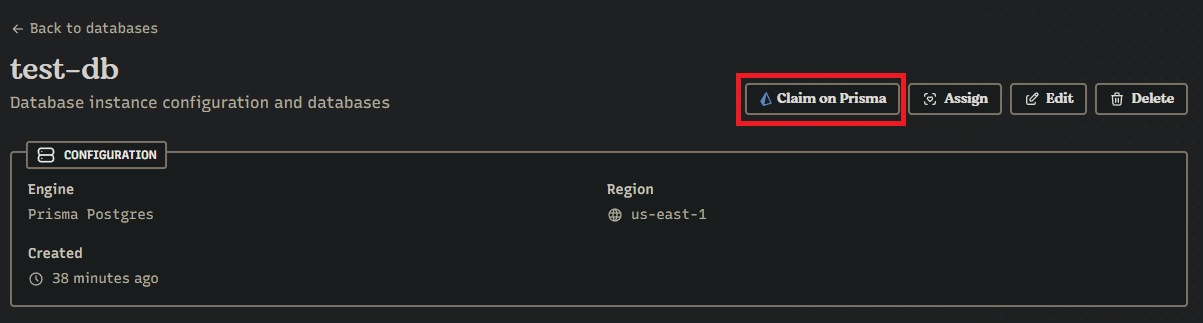
Prisma へ申請をしてみる。
データべ――スの詳細に「Claim on Prisma」があるので、これを押してみる。
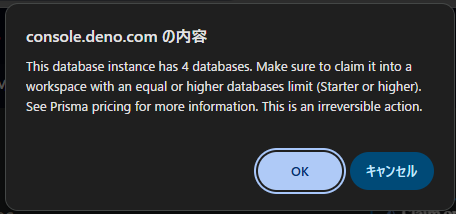
記事を書く前に何回か確認をしていたのでいくつかデータべースを作っているためか、4つのデータベースがあることへのコメントが表示された。
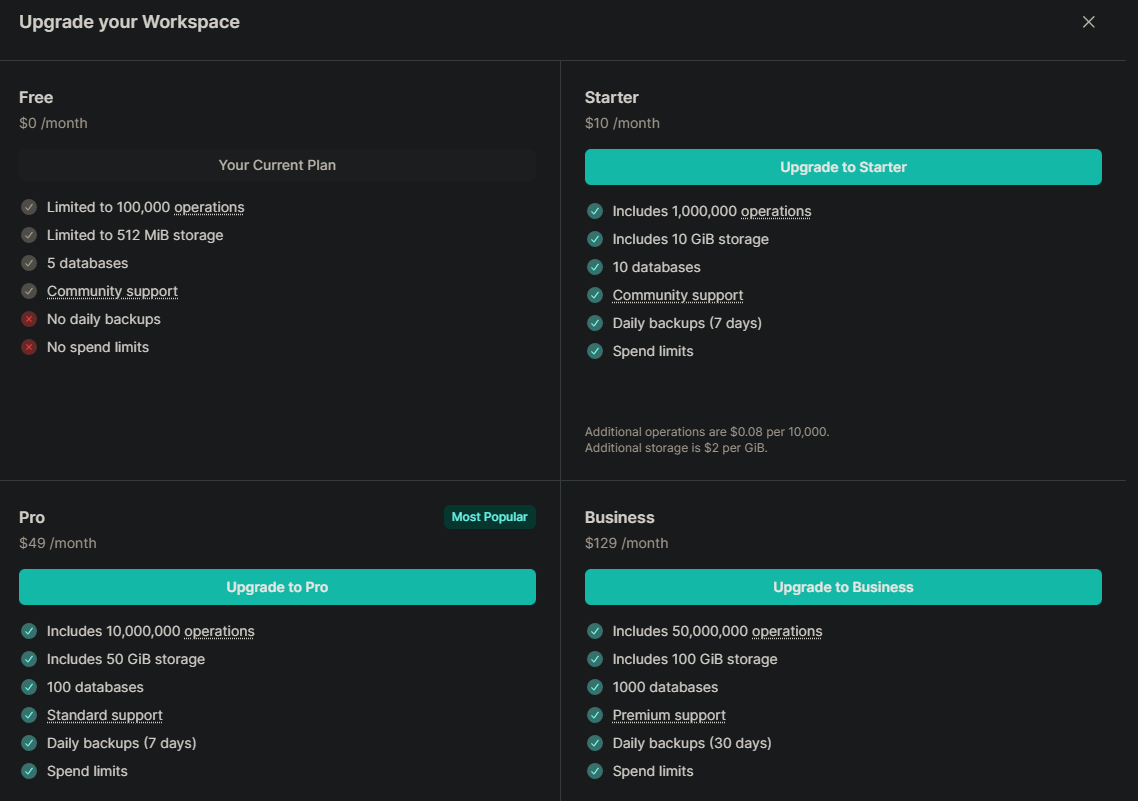
This database instance has 4 databases. Make sure to claim it into a workspace with an equal or higher databases limit (Starter or higher). See Prisma pricing for more information. This is an irreversible action.
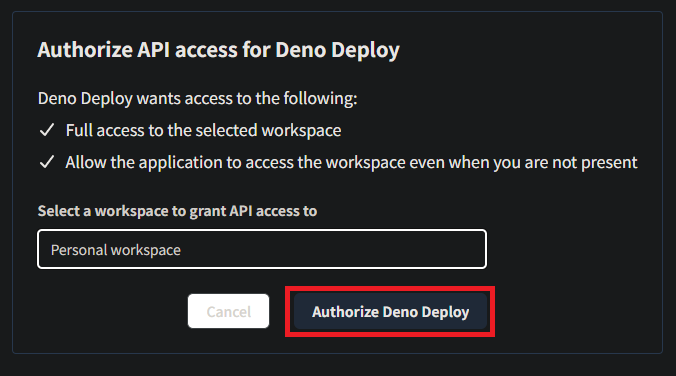
入力フォームのサジェストを使い入力し、「Authorize Deno Deploy」を押す。
この先で、警告も出ていてからか、この後の動線でエラーになってしまった。
確認の途上で先に何度か確認した中ではエラーにならなかったので、条件はなにかあるらしい。
prisma.io の方で、プロジェクトの一覧を見ると先ほどエラーになった動線で登録したものが確認できる。
2件までは登録できていた。
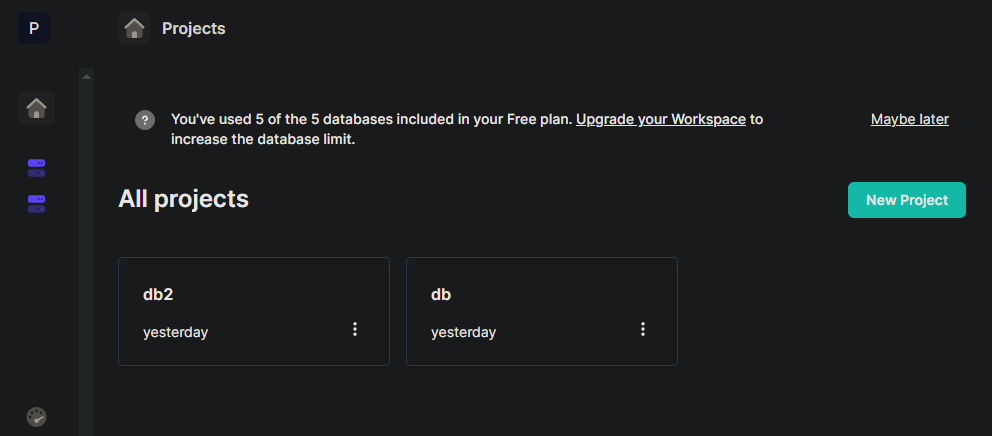
「New Project」を押すと、プランアップグレードの動線になる。
プロジェクト数の制限について、prisma.ioの価格の記載でもはない様子。
具体的な情報は不明。
以上、Deno Deploy を介したprisma.io 提供のPostgreSQLの利用についてでした。
月10万リクエスト、0.5GBのストレージを無料で使えるなら、個人開発に使ういい選択肢となりそうです。
では。